This is very fun and looks amazing on screen, but the best part about it is how easy it is to achieve. To do this effect though, we’re going to need a masked clip so you need to know how to apply a mask to a video which we already learned how to do. We’re going to use the same clip we did on the Masking tutorial:
Right click the clip and select Copy. Paste it on a new track so that you have two of the same clip, one directly beneath the other, like so:
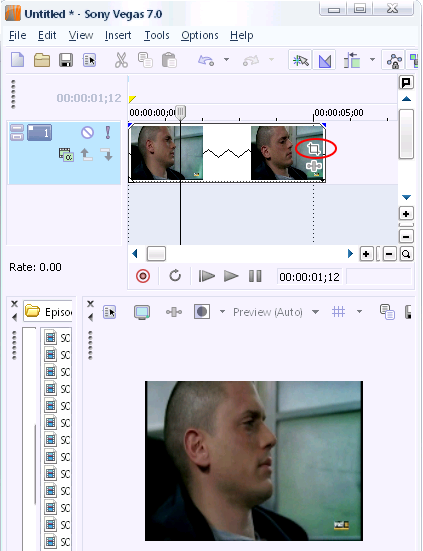
Click on the Event Pan/Crop icon on the lower clip:
You should now be looking at the Event Pan/Crop window. Click the Mask check box on the lower left hand corner, so that it is disabled:
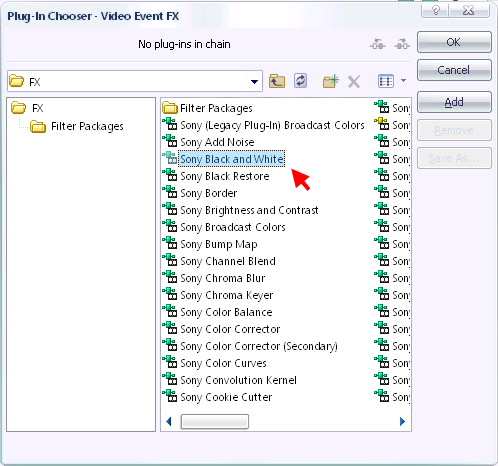
Now click on the Event FX icon on the lower clip and choose Black and White:
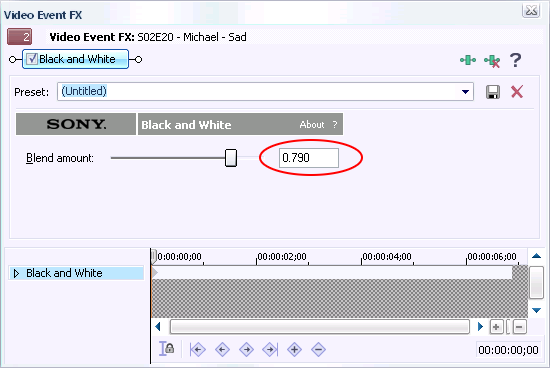
If you’ve done everything like I’ve been telling you to you should now be looking at the window below. Set the blend amount to 0.790 (you do what you want though, this is just an example).
And that’s it! We should see our mask area in full color and our background should appear in black and white. Let’s see it:
Some of you might be wondering what a Mask is. It’s very simple; Masking is the process of covering a part of a photographic film by the application of an opaque border. Needless to say this can be very useful in the creation of very awesome clips. I'm about to tell you how this is done, I suggest you experiment around with this and you'll come up with amazing clips.
Once you start working with masks though, you’ll learn that masking is very complicated and tedious (I’m trying to avoid saying that is a true pain in the ass) if you try to mask a part of a clip that’s moving. For that reason, when masking, it’s my advice to you that you choose clips of people or things that are standing still or with minimal movements, you’re about to see why.
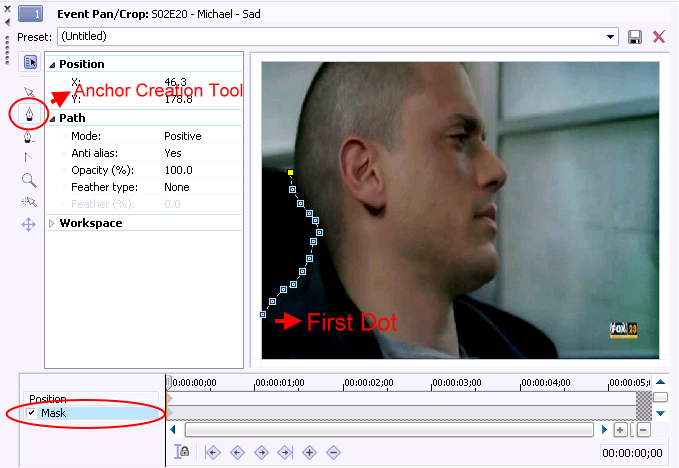
Ok let’s get down to business. We obviously need a clip, right? So I’ve chosen a clip of Michael looking out the bus window and looking very sad. I chose this clip mostly because there’s minimal movement on it. The first thing you need to do is click on the Event Pan/Crop icon on the clip:
You will now be looking at the window below:
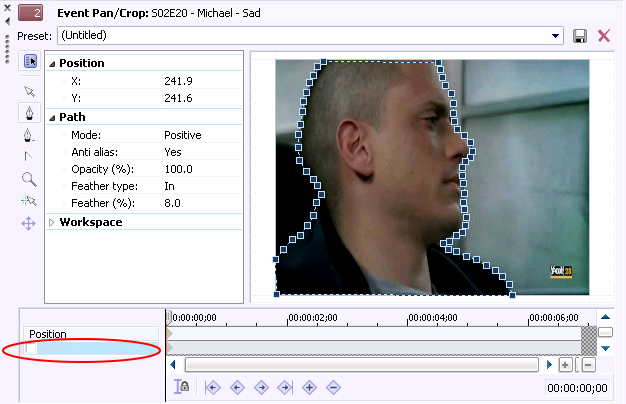
Make sure that you check Mask on the lower left hand corner and also that the Anchor Creation Tool is selected. Now we start to outline him. Keep in mind though that the Anchor Creation Tool only does straight lines, so we need to make a series of connected straight lines around him. Click anywhere one the clip where you want to start outlining and you will see a yellow square. Make another click and the first square will now be blue and the new one will be yellow…. Keep repeating that.
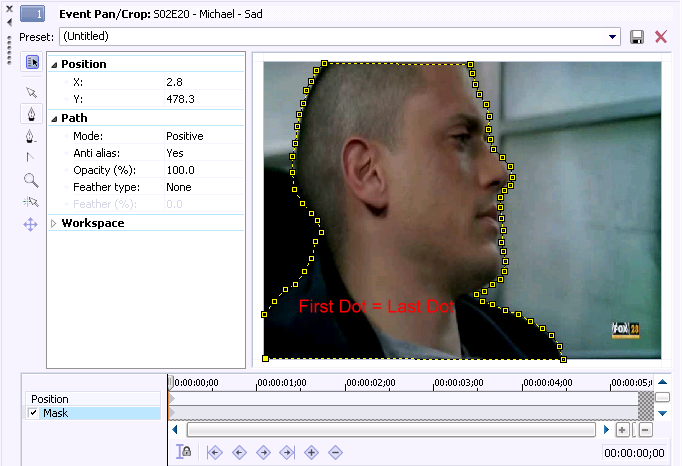
Now to finish the mask you have to make sure that the first point and the last point are the same. If you can’t remember which one was your first point, just put the mouse over some points and when all the squares turn yellow click on that one.
Great! Now that our mask is completed though, we need to apply feathering to soften the edges a little and make our clip look a little better. You can play around with all the settings but for this example I’m only going to set the Feather Type to In and the Feather % to 8, like so:
This is very useful and can be used to achieve more than one type of effect. Track Motion is used to change the position that videos of a track will take on the video window. To show you how this is done let’s play around with a random clip:
As you can see on this clip Sara is on the left side of the screen but for whatever reason let’s say I want her on the right. This is where the Track Motion would be of help. Click anywhere on the track and on the main menu go to Tools >> Video >> Track Motion
After clicking on it you will see this window:
That box in the middle is telling me what position the videos on this track have. I want Sara on the right so I don’t want it centered like it is, so what I’m going to do is drag that box to the position that I want, like so:
After that just close that window and we should have Sara on the right of the screen! Now take a look at the clip we just made:
Note: Keep in mind that whatever changes you make with this will be made to track and therefore all video clips that you place on that track will behave in the same way.
This effect it’s so easy that it’s scary. You’re going to think “Well duh!!” after I tell you how it’s done. You will need two things; a clip and a picture of the empty background (If you don’t know how to empty the background well that’s another tutorial, now isn’t it?). Anyways, to show you how to do this I will use a clip of Michael and Sara hugging and this picture:
Now the picture you choose doesn’t have to be too perfect because the eye doesn’t really focus on much detail. Ok so let us start. Put the clip followed by the picture on the same track, like so:
Now all you need to do is drag the picture over the video clip as much as you want for what you want to achieve. In this case will overlap most of the clip, like so:
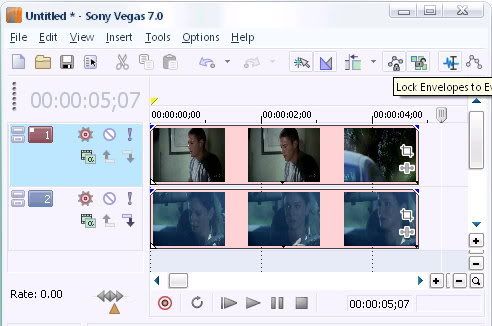
There isn’t a single way to do this. The split screen effect can be achieved using more than one method. The one your about to learn is the one I use. Obviously to make a Split Screen effect you need two or more clips (each on their own track) that are going to be showing at the same time. I will use two; one of Michael’s reaction to Sara’s note and one of Sara hesitating to drive away.
Now, using Track Motion I’m going to position the clips in the way that they look best for whatever it is that I want to do:
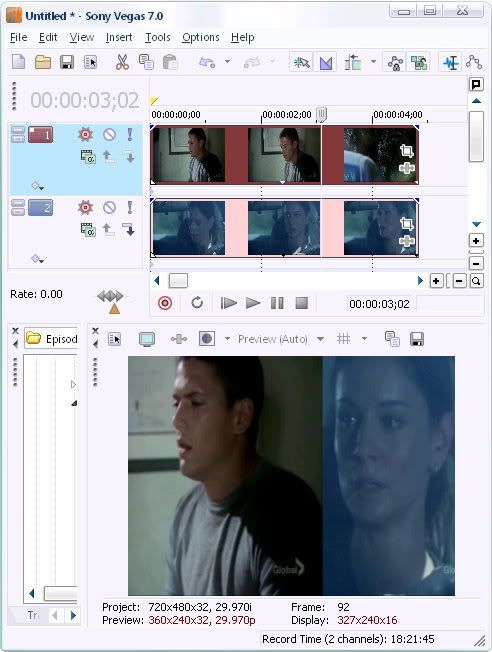
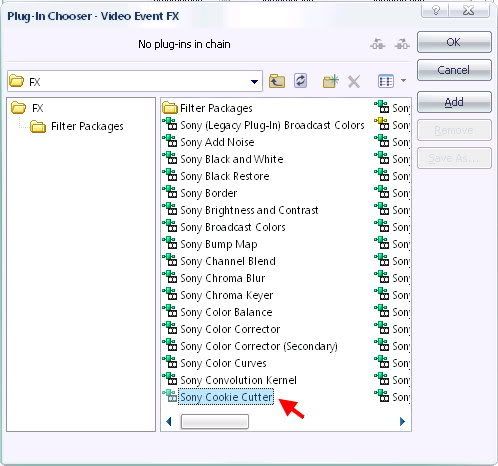
And there you have it, a split screen! Now that doesn’t look very nice, does it? We need to sort of blend the clips together somehow, right? Of course we do. For this we need to apply the Cookie Cutter effect to the top clip. Click on the Video FX icon on the top video clip:
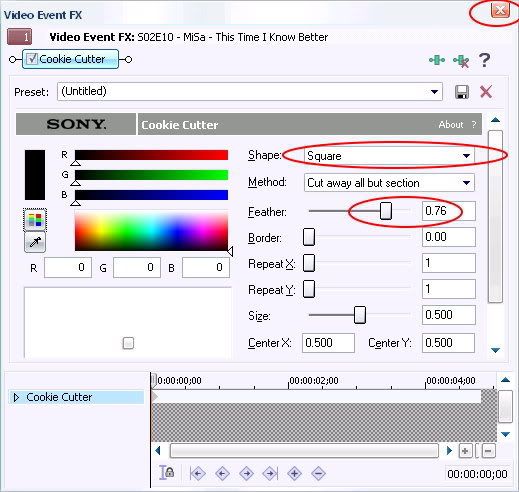
This window will show up. Choose Cookie Cutter.
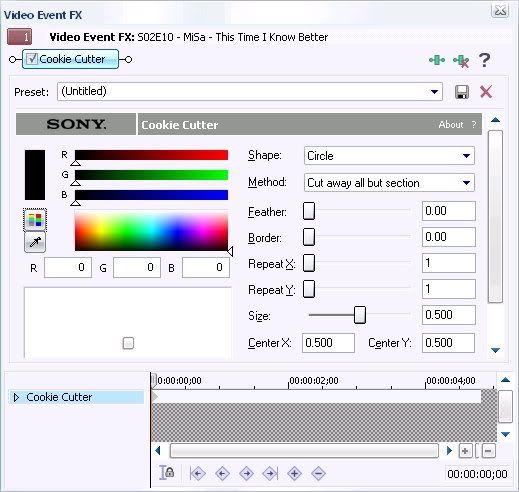
If you did everything right you should now be looking at this window:
What you want to do now is change the Shape to Square, and to soften the edge of the clip, you want to add Feathering. Play around with settings until you get the result you are looking for. Close the window.
Play around with this and you can create wonderful effects. Now let’s see what we’ve just done, shall we?
I've never had this problem (luck, I guess) but I hear a lot of people complaining that their AVI files don't play in Vegas. Well I came across a trick a while back but I haven't been able to test it since I've never had to but hopefully it works.
First of all let me tell you the reason why Vegas won't play your AVI's. AVI files have a code embedded inside of them that it's called a FourCC Code. That can be either mp41, mp42, mp43, XVid, DivX, etc. and for some reason Vegas will only play AVI files with a DivX Code and most of the files of tv shows that we download from torrents and stuff are in XVid format.
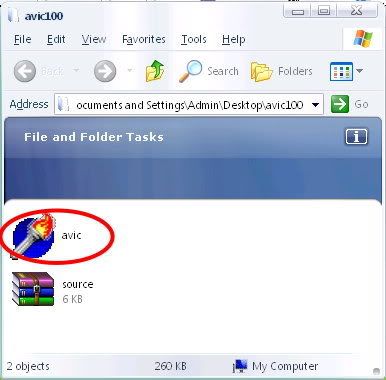
But not all is lost. I came across a little program that'll let you change you AVI's FourCC Code so that you can use them with Vegas. First things first, you need to download this file (it's not a virus, you can trust me). After the file it's downloaded you need to extract the files to your computer. Double click on the one called avic.
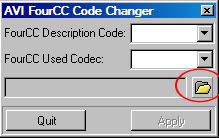
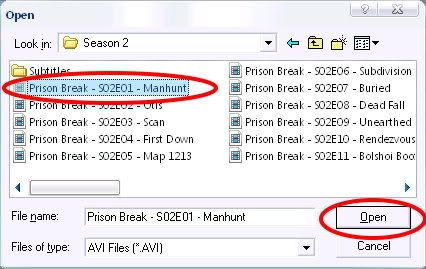
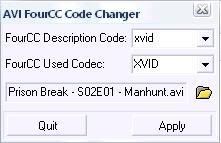
You will now see the little window below. Click on the yellow open folder to the right and choose the AVI file which code you want to change and click open:
You will now see this:
As you can see the file's code is not the right one so what you want to do now is change the FourCC Code to DivX. Click on the field and just type DivX and click apply, like so:
After that, the program will give you a message saying that the the FourCC code for the file has been set. Just click ok.
Now go to Sony Vegas and you should be able to play your file. Hope that helped.
Sony Vegas is video editing software that let's you do amazing things with your video clips. It can be quite confusing at first, specially if you're a former Windows Movie Maker user, like myself, but once you figure it out you absolutely love it.
Now I'm no expert or anything like that but I have decided to share with the world everything I know (which is not a lot) about video editing with Vegas so that if any of you wants to make a fanvideo (or personal video) of any kind you have a few cool tricks up your sleeve.
Every time I learn something new I promise I will come here and write a tutorial about it so come here often to see if there's anything new. Also, feel free to request tutorials if you want to know how to do a certain thing and, if I know how to do it, I'd be pleased to make a tutorial for you. If you have questions about Windows Movie Maker or Ulead Video Studio I might be able to answer them since I know a little about those two, but I won't make tutorials about them. All the tuts you will find here will be about Sony Vegas 7.